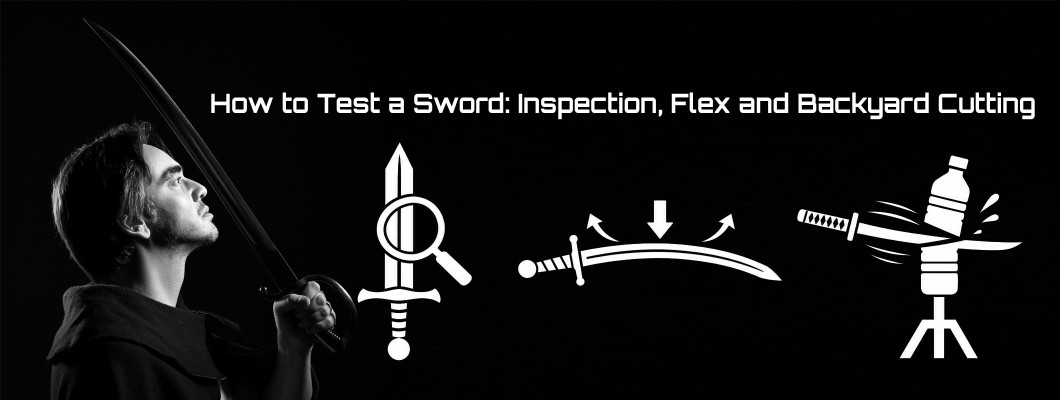
How to Test a Sword: Inspection, Handling, Flex and Backyard Cutting
Cutting is the last step of testing a sword, not the first. Before you swing at anything you check the fittings, the tang, the edge and the flex, then learn what the blade wants to do in your hands. The failures that hurt people are almost always the ones that were visible while the sword was standing still.
This is a complete guide to sword testing for someone who owns a functional blade — how to inspect it, how to flex it without ruining it, what balance tells you, how to set up backyard cutting that gives honest feedback, and how to read what a cut is telling you. It covers Japanese swords and everything else, because almost every guide online covers only the katana and most people testing a sword are holding something different.
What Sword Testing Actually Tells You
Two entirely different things are being tested whenever a blade meets a target, and confusing them is the commonest mistake in the hobby.
The sword is tested on whether it stays together, holds its edge, and returns straight after flex. That is a pass or fail question and a sound blade passes it every time.
You are tested by whether the cut succeeds. Once a blade is confirmed sound, almost every failed cut is the cutter — usually edge alignment — and almost none is sharpness. A sword that stalls in a target reveals the practitioner far more than it reveals the steel.
Japanese practice draws this line formally, with separate terms for testing the sword and testing the cutting ability. Keep them separate in your own head too. A blade that fails inspection should never reach a target, and a cut that fails on a sound blade is information about your technique — which is the more useful of the two.
Step One: The Five-Point Inspection
Before every session and again after. Two minutes, in this order.
1. The pommel and grip. Hold the blade and try to twist the grip. There should be no movement and no click. A pommel that turns even slightly means the assembly has loosened, and that is the failure that sends a blade across a garden. Stop there.
2. The guard. It should sit hard against the blade shoulders with no gap and no rattle. A guard that shifts under thumb pressure will move under impact.
3. The tang shoulders. Look where the blade meets the guard. This is where swords break, because it is where stress concentrates. Any crack, notch or nick there ends the session permanently.
4. The edge, along its whole length. Run your eye down it in good light — not your finger. You are looking for chips, rolls and flat spots. A rolled edge can be steeled back; a chip means something was struck that should not have been.
5. The blade, sighted from the pommel. Hold it up and look down the length as you would sight a rifle. It should be straight, or smoothly curved if the pattern is curved. A kink or a wave means a previous cut went badly and the blade took a set.
Step Two: Reading the Flex
The flex test is the most misunderstood check in sword ownership and the one most likely to damage a blade if done wrong.
What it demonstrates. A properly heat-treated high-carbon blade flexes under load and returns perfectly straight. That is the whole point of spring steel — 5160 exists because vehicle suspension must flex repeatedly without taking a set. A blade that stays bent was not tempered correctly. A blade that cracks was too hard.
How to do it safely. Point down on a solid floor, blade vertical, hold the grip and press down gently and progressively while watching the bend. Release slowly and sight down the blade. It should be exactly as straight as it was.
Where people go wrong. They flex too far. Published flex ratings come from controlled testing to destruction, and a hard flex on a finished sword can leave a permanent bend that nobody can undo. A modest bend that returns true tells you everything a violent one would.
If the blade returns straight and the hilt is tight, the sword has passed everything an owner can reasonably test without risking damage.
Step Three: Handling and Balance
Learn what the sword wants to do before you ask it to cut. Two minutes here saves a lot of poor cuts.
Find the balance point. Rest the blade across one finger and move until it balances. On most functional one-handed swords that falls within a few inches of the guard; on longer two-handed blades it sits further out. Neither is right or wrong — it tells you where the mass is and therefore how the sword will behave.
A forward balance means authority and slower recovery. The blade carries through a target well and takes longer to bring back. A balance close to the hand means quicker changes of direction and less power delivered on its own. Our sword balance guide covers the mechanics.
Swing slowly in open air first. Not hard, not fast. You are learning where the edge is without looking at it, and that is the skill that decides every cut you make afterwards.
Test Cutting Safety: The Part to Read Twice
A sharp sword swung at speed is genuinely dangerous, and most test cutting injuries come from the same short list.
Clear the area completely. Nobody within twice the sword's length in any direction, including behind you and including anyone filming. Failed cuts send the blade in directions you did not plan.
Look up and down. Washing lines, branches, fence tops, uneven ground, a hose in the grass. Your feet matter as much as your hands.
Wear real shoes. Closed and sturdy. Bare feet or sandals in a cutting session is how people lose toes.
Never cut toward yourself, and never below knee height. A blade that skips off a low target has your legs directly in its path.
Never cut at anything held by a person, and never at a target standing on a surface you would mind striking. Concrete destroys edges and throws fragments.
Not tired, not rushed, not after a drink. Cutting is a concentration activity and most accident reports start with one of those three.
Sheathe the sword between cuts. Not leaning on a wall, not lying in the grass where someone will step on it.
Backyard Sword Cutting: Targets You Can Actually Buy
Most cutting guides open with tatami. That advice has aged badly — tatami omote has been in critical shortage since the main supplier closed in 2022, and the community has no agreed replacement. Start with what you can actually get.
| Target | Difficulty | What it teaches | Notes |
|---|---|---|---|
| Plastic water bottles, filled | Easy | Edge alignment and basic mechanics | The universal starting target. Cheap, safe, instantly readable |
| Milk jugs, filled | Easy | Cutting through mass rather than skin | Heavier than bottles and more forgiving of a slow cut |
| Cardboard tubes | Easy to moderate | Clean alignment. A bad cut crushes instead of slicing | Free from any carpet shop. Badly underrated |
| Rolled soaked newspaper | Moderate | The closest cheap analogue to tatami | Roll tight, soak overnight, drain. Messy and effective |
| Straw beach mats, rolled | Moderate | Consistent resistance | Three or four rolled approximate one tatami at a fraction of the price |
| Tatami omote | Moderate to hard | The most consistent feedback available | Scarce and expensive since 2022. Save it until you cut reliably |
| Pool noodles | Easy | Very little, but safe while finding the motion | Cuts even with poor alignment, which is the drawback |
| Fruit and vegetables | Easy to moderate | Precision on a small target | Fun, wasteful, and a poor test of anything mechanical |
| Fresh green bamboo | Hard | Whether your edge geometry survives hard targets | Advanced only. See the bamboo section below |
| Single sheet of paper | Very hard | Pure sharpness and speed | A skill demonstration rather than a test of the sword |
Work up in that order. Someone who can take the top off a standing water bottle without tipping it has learned more than someone who hacked through a pool noodle, because the bottle punishes bad alignment and the noodle forgives it.
Edge Geometry: Why Some Blades Chip on Hard Targets
This is the concept that explains why a blade can cut tatami beautifully and chip on bamboo, and almost no general guide mentions it.
Japanese smiths call it niku, meaning meat — the amount of convexity behind the edge. A blade with a lot of niku has a rounded, meaty cross-section behind the cutting edge, carrying more mass and resisting impact well. A blade with little or no niku is thin and flat behind the edge, which slices with less resistance and is more fragile.
| Edge geometry | Cuts well | Struggles or chips on |
|---|---|---|
| Thin, flat or hollow behind the edge | Paper, tatami, soft mats, light targets, precision cuts | Bamboo, hardwood, anything dense or springy |
| Convex with pronounced niku | Bamboo, bundled targets, thick and hard material | Fine precision cuts. It slices less easily on light targets |
The practical rule: match the edge to what you intend to cut, and do not expect one geometry to do both jobs. A sword ground for paper cutting is not the sword for bamboo, and a buyer who cuts bamboo with it will conclude the steel is bad when the geometry was simply wrong for the target.
This is worth deciding before you order rather than after. Tell us what you intend to cut and we will grind the edge for it.
How Different Sword Steels Behave Under Cutting
Steel labels are a rough filter rather than an answer, because heat treatment and construction matter more than the alloy number. But the common blade steels do behave differently in practice, and it is worth knowing which you have.
| Steel | Character under cutting | Forgives alignment errors |
|---|---|---|
| 1060 | A common entry-level choice. Softer edge, holds up to mistakes | Most forgiving |
| 1095 and T10 | Harder edge, holds sharpness longer, rewards clean technique | Least forgiving. Punishes sloppy contact |
| 5160 and 9260 | Tough and flexible, prioritising impact resistance over hardness | Forgiving under impact; will not hold a razor edge as long |
| Stainless | Not suitable for cutting at sword lengths. Can shatter | Do not cut with it |
What this means when a cut fails. A chip on a hard steel is often the target and the alignment rather than the blade being faulty. A roll on a tougher steel is normal and is steeled straight in minutes. Neither is automatically a defect, and knowing which steel you hold tells you which to expect.
We forge in 5160 for exactly the reason the table shows: it is heat treated toward toughness rather than maximum hardness, which is the right trade for a blade that gets hit. The honest cost is that it will not hold a hair-splitting edge as long as a harder steel. Our post on why we forge in 5160 covers the metallurgy.
Bamboo: The Progression That Prevents Chipped Blades
Bamboo deserves its own section because it is where good swords get damaged, and because most people attempt it far too early and far too thick.
Fresh green bamboo is dense and springy, and it has long been used as a rough analogue for bone. Work up by diameter rather than jumping in.
| Level | Diameter | What it asks of you |
|---|---|---|
| Beginner | 12 to 16 mm | Builds edge awareness. Cuts cleanly with decent alignment |
| Intermediate | 18 to 24 mm | Requires genuinely clean alignment and stronger technique |
| Advanced | 25 to 40 mm | Full control, timing and follow-through. Unforgiving of any error |
Two rules that save blades. Use green bamboo only — dry bamboo is far harder, splinters violently and will damage most edges. And use a blade with enough niku, per the geometry section above. A thin precision edge on thick bamboo is a chipped edge.
Edge Alignment: The Only Variable That Matters
If you take one thing from this guide, take this. Almost every failed cut is edge alignment, not sharpness.
Edge alignment means the edge travelling in exactly the plane of the swing. A blade even slightly off that plane arrives at an angle, and instead of slicing it slaps — the target flies, the blade jars in your hands, and the natural conclusion is that the sword is not sharp enough. It almost always is.
How to improve it. Slow air cuts, watching where the edge points through the whole arc. Cut cardboard tubes, which punish misalignment by crushing rather than slicing. And stop trying to cut hard — force compensates for nothing and makes alignment worse. A relaxed accurate cut beats a violent one every time.
Reading Your Cut: A Diagnostic Table
Every failed cut tells you something specific. This is the section to keep beside you at the stand.
| What happened | Almost always means | What to change |
|---|---|---|
| Loud cut, target knocked sideways, jarring through the grip | Edge alignment off the plane of the swing | Slow down. Air cuts watching the edge. Cardboard tubes |
| Blade stalled part way through | Not enough speed, or the cut decelerated at contact | Follow through past the target rather than at it |
| Cut went through but the surface is torn and ragged | Alignment was close but not clean, or the edge is dull | Check the edge first, then alignment |
| Target crushed rather than sliced | Alignment well off, or a very dull edge | Inspect the edge properly before continuing |
| Cut is clean but the target falls off the stand | Fine cut. The target was not spiked or seated properly | Fix the stand, not your technique |
| Blade chipped | Target too hard for the edge geometry, or something was hit | Stop. Inspect. Reconsider the target or the blade |
| Blade took a bend | Severe misalignment, or a target harder than the blade allows | Stop entirely. The sword needs assessment |
| Quiet cut, target barely moves, clean face | Correct alignment, speed and follow-through | Nothing. That is the target you are aiming for |
The last row is the one to memorise. A good cut is quiet and the target hardly moves. If it is loud and dramatic, something went wrong, whatever it looked like on video.
Setting Up a Stand
Backyard cutting needs the target held at a sensible height, on something that does not damage the blade when a cut goes wrong.
The simplest arrangement is a length of timber or pipe set in a bucket of concrete, with a spike or bolt on top to hold the target. Chest height for standing cuts. What matters is that the part your blade might strike is soft — the top of the post should be wood rather than the bolt, and the base should be out of reach of a low cut.
Free-hanging targets on string look impressive and teach very little, because a hanging target moves away instead of resisting. Fixed and spiked targets give honest feedback.
Set the stand on grass or soil rather than paving. When a cut fails and the blade continues, you want it meeting turf.
Building a Session
Cutting well is a practice rather than an event, and a structured session teaches far more than an afternoon of swinging.
Form first, without a target. Ten to twenty minutes of grip, stance, footwork and slow air cuts. Ideally with a blunt if you own one.
Then cutting, in a focused block. Fifteen to thirty minutes, concentrating on smooth motion and recovery between cuts rather than volume.
Then maintenance and honest reflection. Five to ten minutes cleaning the blade and noting what worked. A short log of clean cuts per session shows progress that memory will not.
Volume by level: a beginner should aim for one to three targets per session and focus entirely on consistency; intermediate three to six, introducing sequences; advanced six or more, with thicker material and mixed bundles.
Do not cut heavily every day. Three to five sessions a week is plenty, alternating cutting with form work. Fatigue is where alignment goes and where accidents happen.
Testing Swords That Are Not Katana
Nearly every cutting guide online assumes a katana. Most people testing a sword are holding something else, and the differences matter.
| Type | What changes |
|---|---|
| Arming sword | One hand, so alignment relies on wrist and forearm alone. Cut with the last third of the blade, not the middle |
| Longsword | Two hands give leverage and better alignment control. Beware over-committing; the recovery is slower than it feels |
| Viking sword and broad cutters | Wide blade, forward mass, made for draw cuts against soft targets. Excellent on bottles and mats |
| Gladius and short swords | Short reach means standing closer, which people find uncomfortable. Thrusting tests suit them better than cuts |
| Sabres and curved swords | The curve does the slicing. Let the blade draw through rather than chopping straight in |
| Kukri and khukuri | Forward cant delivers the impact ahead of your hand. Aim with the belly of the blade, not the tip |
| Machetes | Built for vegetation rather than mats. Test on green growth and light wood, not on bottles |
The general principle holds across all of them: every blade has a sweet spot where a cut lands cleanly with minimal vibration in the hand, and finding yours is worth an entire session on its own.
How Swords Were Historically Tested
Worth knowing, because it puts modern backyard cutting in context and because the historical methods were tests of the sword rather than of the swordsman.
Edo-period Japan formalised sword testing, and by the Bakumatsu period a practice called aratameshi had emerged that tested the blade's structure rather than its cutting. The sides, back and edge of a sword were struck against a heavy oak staff to establish whether the blade would survive abuse. Other methods used bamboo wrapped in straw to imitate the density of flesh over bone, deer antler as a hard target, and water.
Those last two make a point that still applies. Antler and straw-wrapped bamboo demand different edge geometry — one hard, one soft — and a smith balancing a blade for both faced exactly the compromise described in the geometry section above. Nothing has changed except the targets.
Modern practice inverted the purpose. Where historical testing judged the sword, tameshigiri today is understood to test the swordsman, and the swords used are often deliberately inexpensive.
What Not to Cut, Ever
Short list, and every item destroys blades or people.
Trees and standing timber. A sword is not an axe. The blade binds, the shock goes into your wrists, and the edge chips.
Metal of any kind — drums, poles, car panels, other swords. Edge-on-edge contact ruins both blades and is a film convention, not a technique.
Anything frozen. A frozen bottle is effectively a rock.
Dry bamboo. Far harder than green, splinters violently, damages most edges.
Anything on the ground or on concrete. The follow-through has nowhere to go.
Anything a person is holding or standing near. No exceptions and no jokes about it.
After a Cutting Session: Inspection and Care
Repeat the five-point inspection. You are looking for anything that changed — a loosened pommel, a chip, a bend.
Clean and dry immediately. Bottles, soaked mats and fruit all leave the blade wet, and high-carbon steel rusts fast. Wipe it dry the moment you finish, not that evening.
Oil the blade. Light machine oil, mineral oil or blade oil, thin along the whole length including under the guard where moisture sits.
Deal with edge damage before storing. A rolled edge can be steeled straight. A chip needs grinding out, which is a job for someone who knows what they are doing — take too much and the geometry changes.
Store dry and out of a leather scabbard. Leather holds moisture and will corrode a blade left in it.
Swords Built to Be Tested, Not Displayed
Every Everest Forge blade is 5160 spring steel, oil quenched and tempered by hand, full tang, and sharpened as standard. There is no display-only tier. Tell us what you intend to cut and we will grind the edge geometry for those targets rather than a compromise.
Frequently Asked Questions
How do I test a sword to see if it is any good?
In order: check the pommel and guard are tight with no movement, inspect the tang shoulders for cracks, sight down the blade for straightness, examine the edge for chips, then flex it gently against the floor and confirm it returns perfectly straight. A blade that passes all five has passed everything an owner can test without risking damage. Only then is it worth cutting with.
What can I cut with a sword in my backyard?
Start with filled plastic water bottles, which are cheap, safe and punish bad edge alignment immediately. Then milk jugs, cardboard tubes and rolled soaked newspaper. Rolled straw beach mats are a good tatami substitute — three or four approximate one tatami at a fraction of the cost. Leave tatami and green bamboo until you cut reliably, and never cut anything frozen, metal, or standing on concrete.
Why won't my sword cut properly?
Almost certainly edge alignment rather than sharpness. If the edge is not travelling in exactly the plane of the swing it arrives at an angle and slaps rather than slices. The signs are a loud cut, the target knocked sideways and a jar through the grip. A good cut is quiet and the target barely moves. Practise slow air cuts and cut cardboard tubes, which crush rather than slice when alignment is off.
How do I flex test a sword without damaging it?
Point down on a solid floor, blade vertical, press the grip down gently and progressively, then release slowly and sight down the blade for straightness. A modest bend that returns true tells you everything. Do not push hard — published flex ratings come from controlled testing to destruction, and a violent flex on a finished sword can leave a permanent bend that cannot be undone.
What is niku and why does it matter for cutting?
Niku is the Japanese term for the convexity behind the edge — literally meat. A blade with pronounced niku has a rounded, meatier cross-section that carries mass and resists impact, which suits bamboo and thick targets. A thin, flat or hollow edge slices light targets and precision cuts far better but chips on hard material. Match the geometry to what you intend to cut; no single edge does both jobs well.
Can I cut bamboo with my sword?
Only fresh green bamboo, only once you cut reliably on soft targets, and only with enough niku behind the edge. Work up by diameter: 12 to 16 mm for a beginner, 18 to 24 mm at intermediate, 25 to 40 mm advanced. Dry bamboo should be avoided entirely — it is far harder than green, splinters violently and damages most edges.
Which sword steel is best for cutting practice?
Steel labels are a rough filter, because heat treatment and construction matter more than the alloy number. In general 1060 is the most forgiving of alignment mistakes, 1095 and T10 hold a harder edge but punish sloppy contact, and 5160 and 9260 prioritise toughness and flex over outright hardness. Stainless should never be cut with at sword lengths — it can shatter.
What does it mean if my blade chipped or rolled?
A roll on a tougher steel is normal after hard use and is steeled straight in minutes. A chip usually means the target was too hard for the edge geometry, or something unintended was struck. Neither is automatically a defect. A blade that takes a permanent bend is more serious — stop the session entirely and have the sword assessed before using it again.
Is tatami still the standard cutting target?
It remains the most consistent target and the standard in cutting competitions, because every mat behaves the same so any difference in result comes from the cutter. But tatami omote has been in critical shortage since the main supplier closed in 2022 and there is no agreed replacement. Rolled soaked newspaper and rolled straw beach mats are the practical substitutes for backyard practice.
Is cutting practice different with a non-Japanese sword?
Yes, in ways most guides ignore. A one-handed arming sword relies on wrist and forearm for alignment and cuts with the last third of the blade. A longsword gives leverage but recovers more slowly than it feels. Sabres slice through the curve rather than chopping. A kukri delivers impact ahead of your hand and is aimed with the belly, not the tip. Machetes should be tested on green growth rather than mats.
How often should I practise cutting?
Three to five sessions a week is plenty, and heavy cutting should not be done daily. A useful session is ten to twenty minutes of form work without a target, fifteen to thirty minutes of focused cutting, and five to ten minutes of cleaning and reflection. Beginners should aim for one to three targets per session and concentrate entirely on consistency rather than volume.
How should I clean my sword after cutting?
Immediately, not later. Bottles, soaked mats and fruit leave the blade wet and high-carbon steel rusts fast. Wipe it completely dry the moment you finish, then oil the whole length with light machine oil, mineral oil or blade oil, including under the guard where moisture sits. Store it outside a leather scabbard, because leather holds moisture against the steel.